Affiliate disclosure: Some links on this page are affiliate links. If you purchase through them, we may earn a small commission — at no extra cost to you.
Sign Up for the Tello $5/mo Plan
Tello lets you build a custom plan. To get $5/month, you need to select exactly: No Data + 300 Minutes + Unlimited Texts. Follow the steps below.
Select No Data + 300 Minutes = $5/month
Go to Tello's plan builder. Use the sliders to set:
The price will show $5/month. You don't need data on this plan — you'll use Wi-Fi Calling abroad to receive OTPs for free.
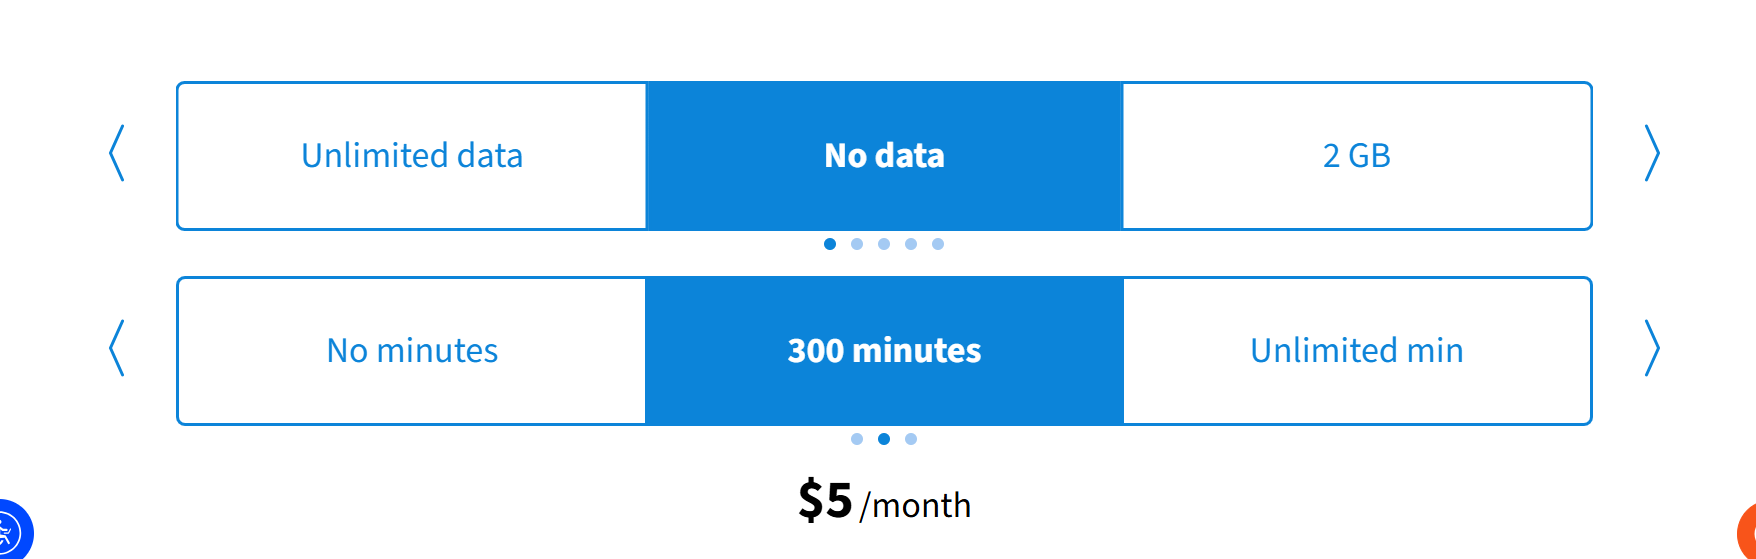
Set No Data + 300 min → $5/mo
Create a Tello Account (New Customers Only)
Click "Get This Plan". On the next screen, click "I'm New" to create a new account. You'll need:
If you already have a Tello account, click "Welcome Back" and skip to Step 3.
Log In to Your Tello Account
Enter your email and password to log in. This brings you into the checkout flow with your $5 plan already selected.
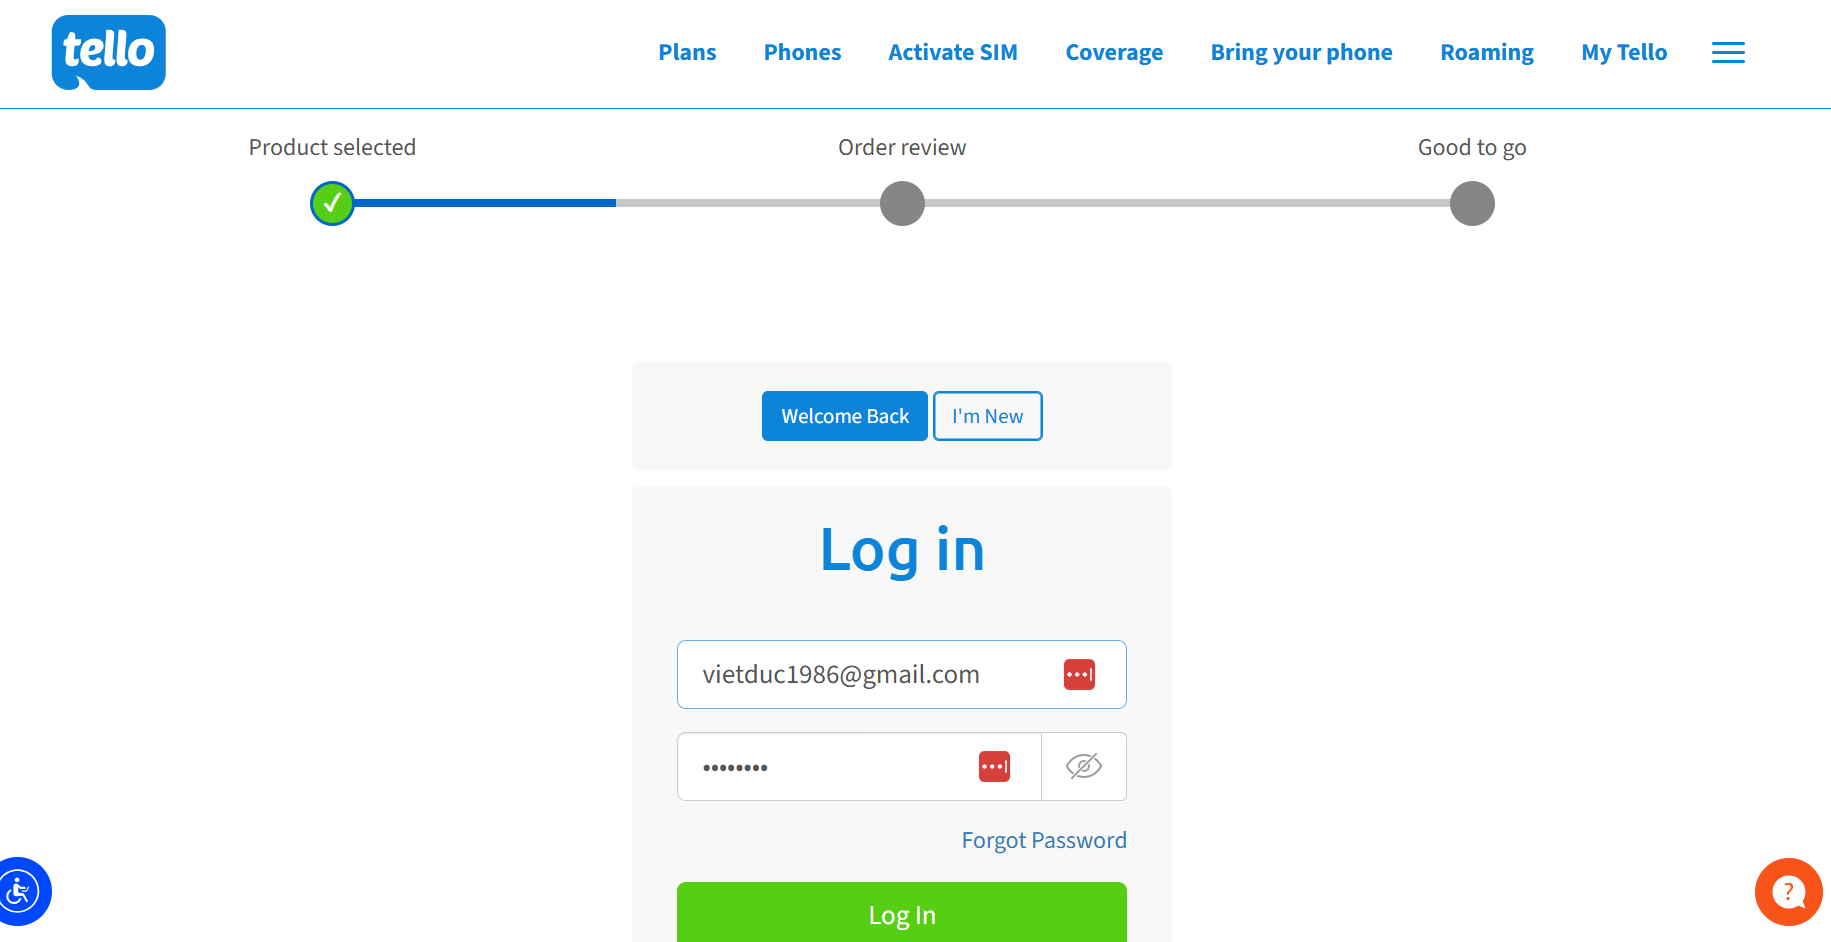
Log in with your email and password
Select "New Tello Line"
Under My number, choose "New Tello Line" from the dropdown. Tello will assign you a new US number based on the ZIP code you enter. Pick any ZIP code in a city you prefer — this determines your area code.
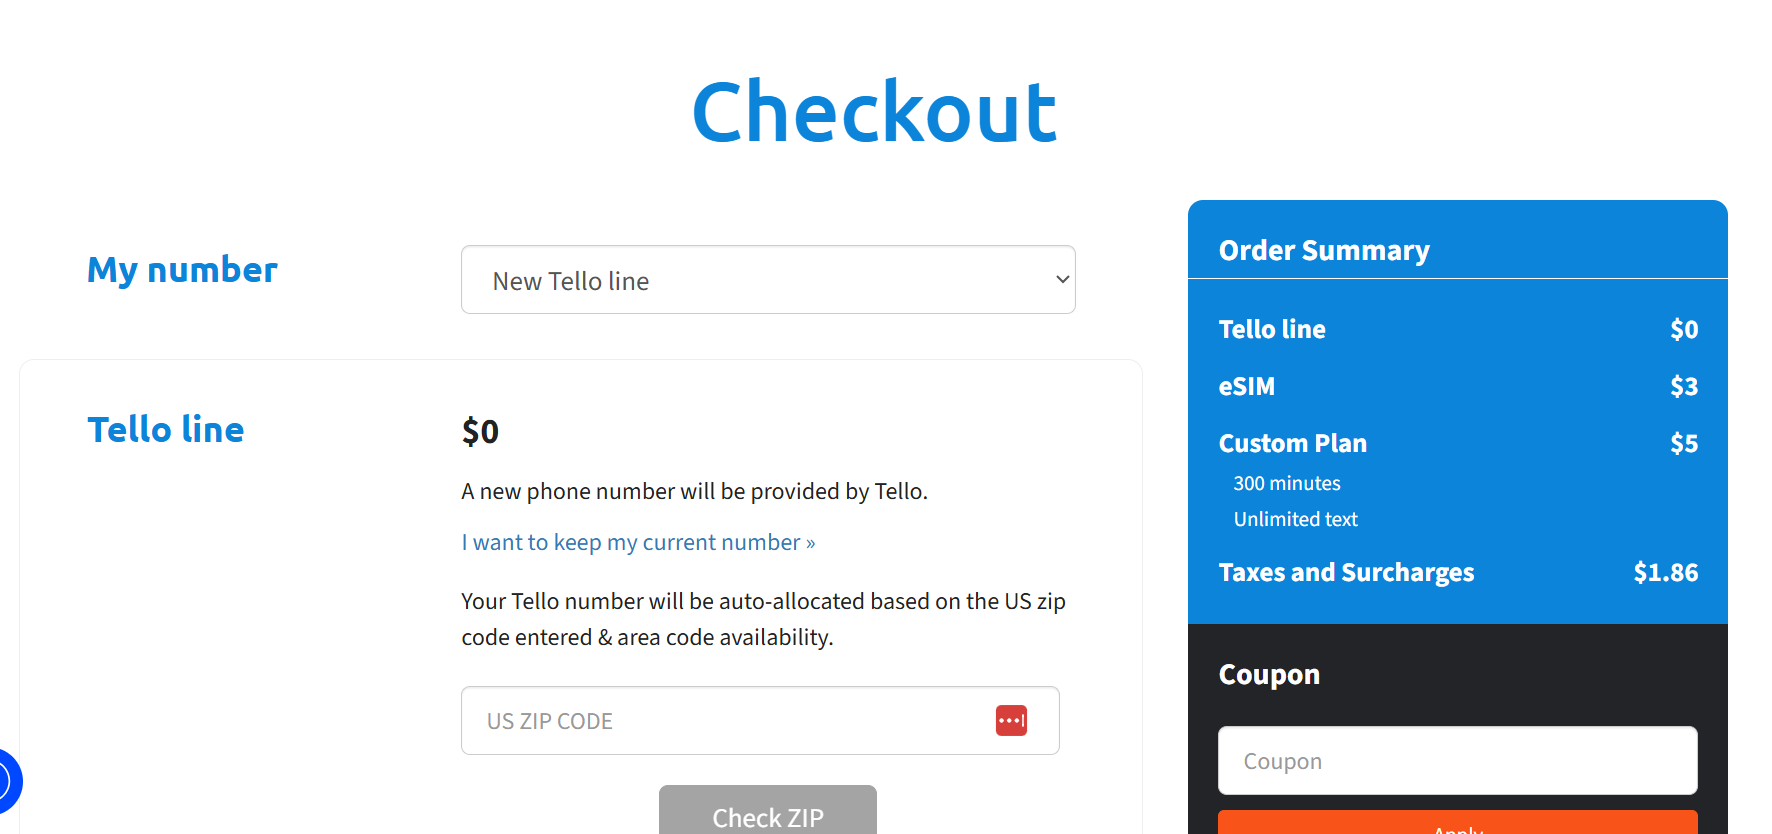
Select "New Tello Line" and enter a ZIP code
Transferring Your Existing Number? No Problem
If you want to keep your current phone number and move it to Tello, don't worry — you don't have to do it now. Just finish your order and get your Tello SIM activated first.
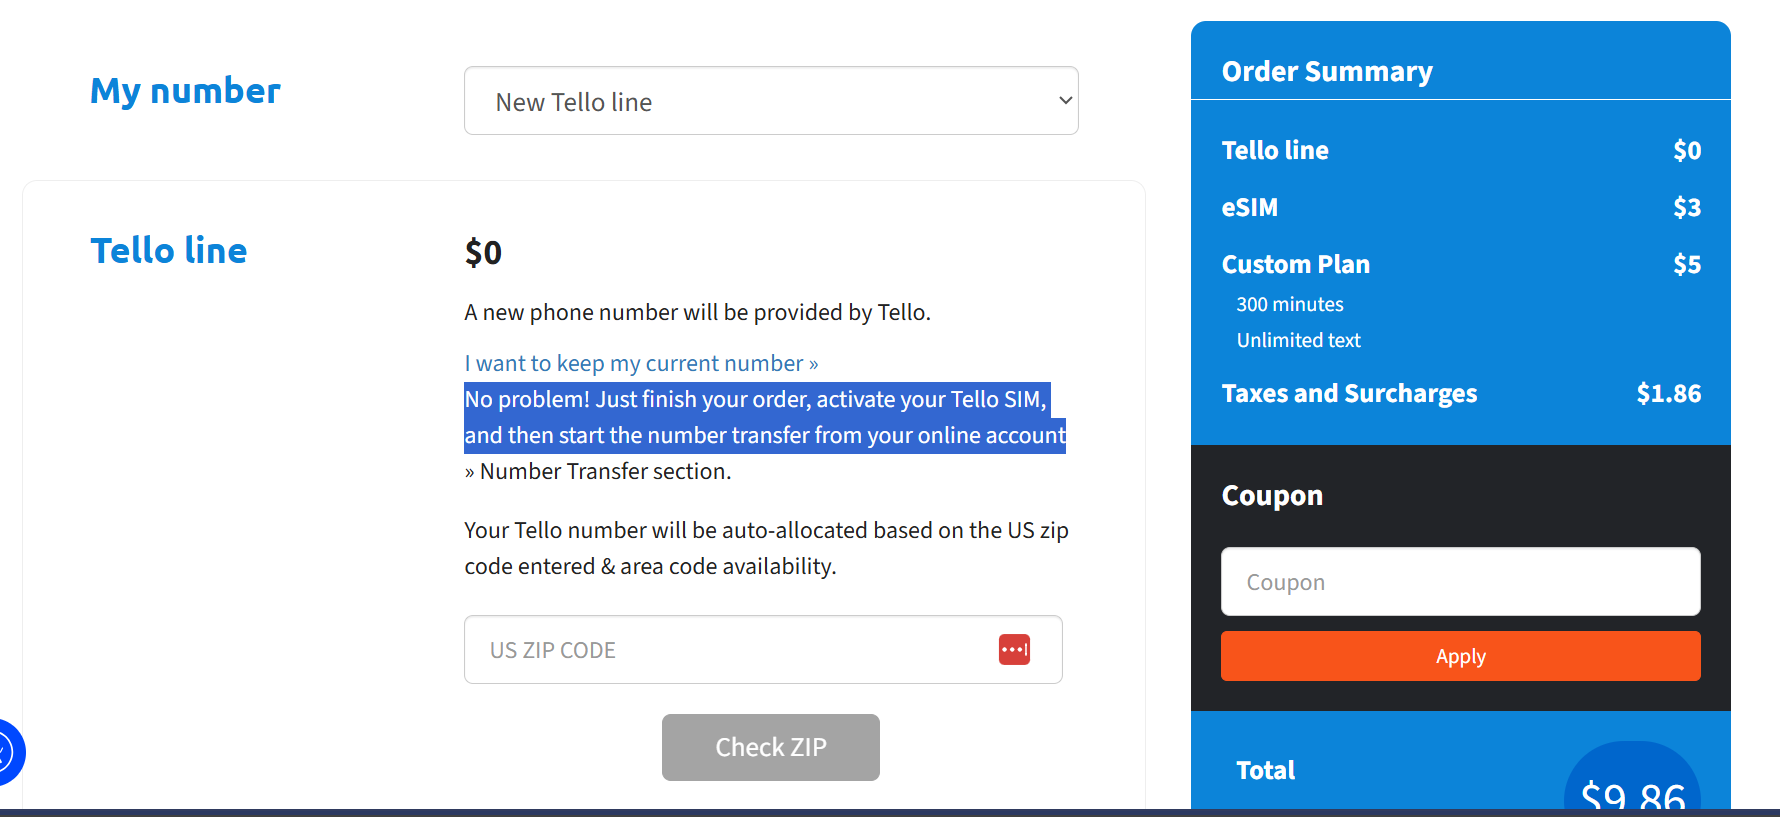
Transfer can be done after activation
Select eSIM ($3 one-time)
Under Tello SIM, select eSIM ($3). This is a one-time charge — your eSIM will be instantly available in your Tello online account after checkout. No physical SIM card will be mailed to you.
Only choose "SIM card ($3)" if you need a physical card — but the eSIM is faster and works immediately.
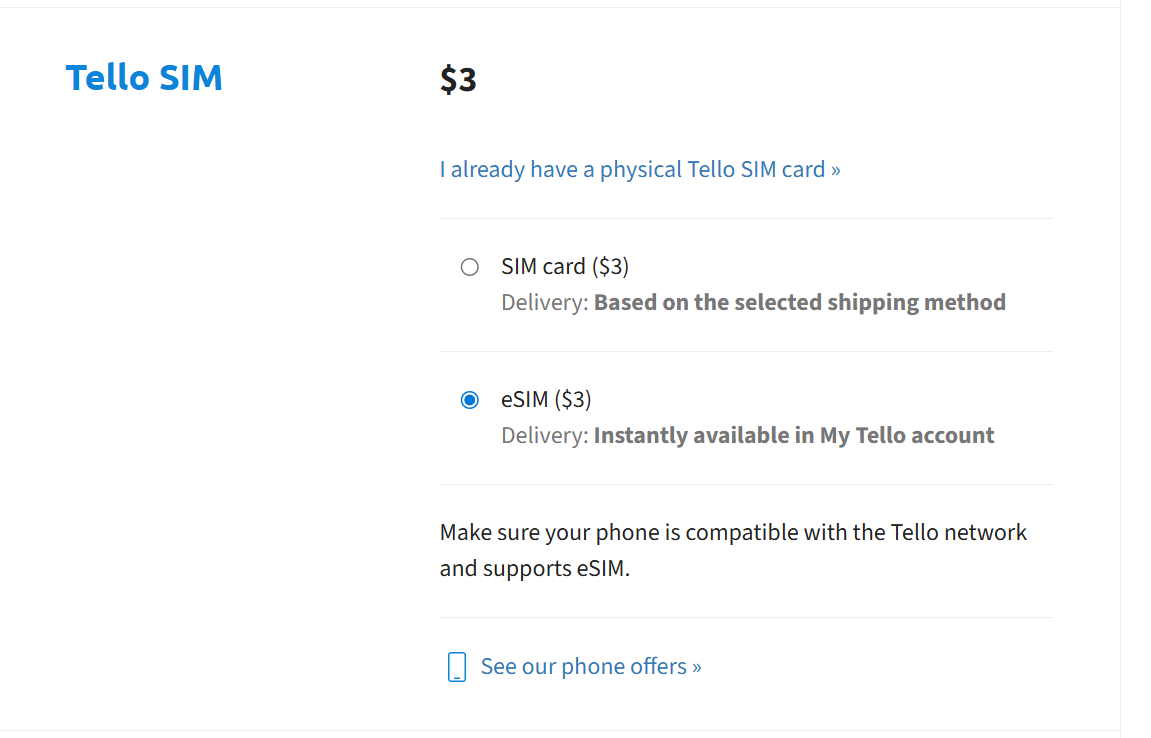
Choose eSIM ($3) for instant delivery
Set Your Account Security PIN
Tello will ask you to create a 4-digit security PIN. This PIN is required when:
- Contacting Tello customer support
- Making changes to your account
- Initiating a number transfer (port-out)
Finalize Your Order
Review your order summary before paying:
Enter your credit/debit card and complete checkout. Your total first month is ~$9.86. Every month after that is just $5 + taxes.
How to Install Your Tello eSIM
After checkout, your eSIM QR code is available instantly in your Tello account. Here's how to install it on iPhone or Android.
Get Your eSIM QR Code
Log in to My Tello at tello.com → go to My Account → SIM & eSIM. Your eSIM QR code will be displayed there. You can also find it in your order confirmation email.
Install on iPhone
Go to Settings → Cellular → Add Cellular Plan → tap Use QR Code → scan the QR code from your Tello account. Then follow the prompts to set it as your primary or secondary line.
Install on Android
Go to Settings → Network & Internet → SIMs → Add SIM → scan the QR code. The exact menu name varies by manufacturer (Samsung, Google Pixel, etc.).
Enable Wi-Fi Calling (Critical for Expats)
This is the most important step. Wi-Fi Calling lets your Tello number receive SMS texts and calls over any Wi-Fi connection — even when you're in Vietnam, Japan, or anywhere abroad.
On iPhone: Settings → Cellular → Wi-Fi Calling → toggle ON → confirm your emergency address.
On Android: Settings → Network → Calls & SMS → Wi-Fi Calling → toggle ON.
How to Transfer Your Existing Number to Tello
Want to keep your current phone number? You can port it to Tello after activating your new SIM. This is called a "port-in" and usually completes within a few hours.
Get Your Account Number & PIN from Your Current Carrier
Before you can transfer your number, you need two things from your current carrier:
Call your current carrier or find these in your online account settings. Carriers are required by law to provide this information when asked. Some carriers call it a "port-out PIN" or "transfer PIN."
Start the Transfer in Your Tello Account
Log in to My Tello → go to My Account → Number Transfer. Enter:
Wait for Confirmation (Usually 1–4 Hours)
Most number transfers complete within 1–4 hours, sometimes up to 1 business day. Tello will send you an email when it's done.
Once the transfer is complete, your old carrier line will be automatically cancelled and your number will be active on Tello.